In part one of this blog post, we deployed a Cloud Director instance and integrated it with a vCenter 8 with Tanzu (TKGs) then created provider VDC, organisation and two tenants (org VDCs). In this part two we are going to continue preparing our tenants (org VDCs) to be able to deploy Tanzu clusters, we will start by assigning Kubernetes rights and entitlement to an organisation user and use the previously published kubernetes policy to our org VDCs (revise part one) to deploy a Tanzu Kubernetes cluster via our tenant portal.
For software versions I used the following:
For virtual hosts and appliances sizing I used the following specs:
In this section we will be finalising our org VDCs preparation for offering TKG clusters by granting the appropriate user roles and permissions to an org user which will be able to deploy TKG clusters from within tenant porta.
In order for tenants to be able to deploy TKG clusters, they need to have TKG rights bundle published to them via Cloud Director. To achieve this, login in to Cloud Director provider portal with vCD admin and navigate to Administration > Tenant Access Control and then click on Rights Bundles, choose vmware.tkgcluster Entitlement and then click on PUBLISH
Choose your organisation (tenant) and then click SAVE
In this step we will create an organisation user and assign TKG permission to it. This user will be used to login to tenant portal and deploy TKG clusters.
From Cloud Director provider portal, navigate to Administration > Tenant Access Control > Global Roles create or clone (I will clone for simplicity) the role “Organization Administrator“
Clone the role and assign a name for your clone
Once the new role is created, edit this role and make sure to add the following rights to it (those rights are under OTHER section of the listed roles)
In addition to the above 2 view rights, we need to add other rights for creating and modifying TKG clusters
Click SAVE and then make sure to PUBLISH the newly created role
Click SAVE to publish the role to our Tenant.
From Cloud Director provider portal, navigate to Resources > Organizations and then open our tenant (org NSXBaaSHomelab) in tenant mode by clicking the small square with arrow on the right of the org name
You should see your VDCs under your tenant portal similar to the below
Now we need to create an organisation user and assign to it the TKG rights we published earlier, navigate to Administration > Access Control > Users and then click NEW and start filling in user information, make sure to assign the organisation administrator with Tanzu Rights to this user
Click SAVE, you should see the user listed
Open a new URL to your Tenant portal, in my setup this is https://<vcloud fqdn or ip address>/tenant/homelab where homelab is the organization we created in part one of this blog post. Login with the created user (nsxbaas) which has TKG admin rights
I will choose my org VDC called Tenant-PindaKaas by clicking on it
From the left pane and under Settings click on Kubernetes Policies, you should see the Kubernetes policy which we published from provider VDC in part one of this blog post which allows only creation of best-effort small and medium VMs
From the top bar, click on More and then choose Kubernetes Container Clusters, I have already created a Tanzu cluster for my other tenant but I will create a new Tanzu cluster for Tenant-PindaKaas so I will click on NEW
In the Create New TKG cluster you can see that the current available Tanzu flavour is TKGs, since I am deploying Tanzu on top of vSphere with Tanzu infrastructure
Click NEXT and then give your TKG cluster a name
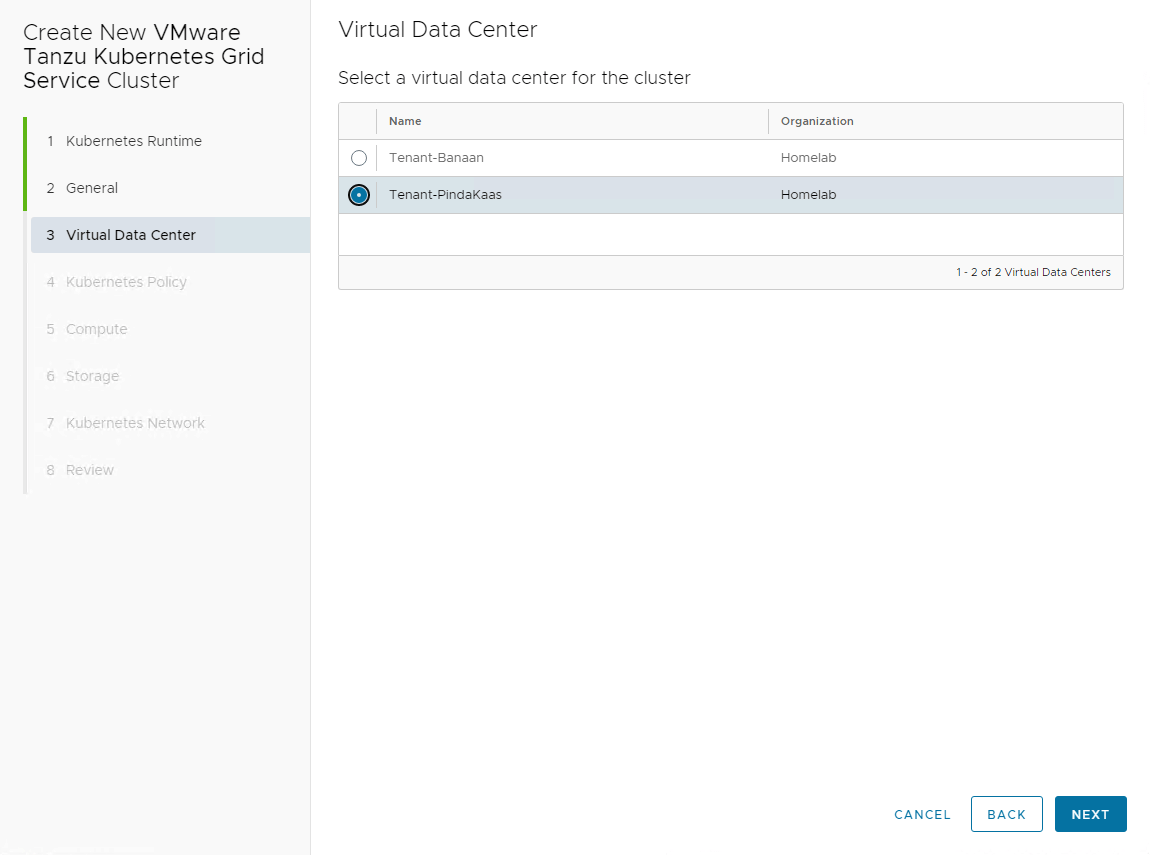
Click NEXT and then choose under which VDC you want to create Tanzu VMs, I will choose Tenant-PindaKaas
NEXT and then in step 4 we need to choose which storage policy will be assigned to our Tanzu nodes VMs, we also need to choose which TKG version we want to deploy, this is pulled automatically by Cloud Director once you add a vCenter with Tanzu enabled and have a content library with TKG machine templates
Tip: from Cloud Director cli you can list the discovered TKG templates by running the following command:
sudo -i -u postgres psql vcloud -c "select kubernetes_versions from ccr_wcp_inv;"
Click NEXT and then in step 5 we choose number of control and worker nodes and their size
Click NEXT and then select a storage class for control and worker nodes
Click NEXT and then in step 7 you get to assign pods and services CIDRs (make sure to not overlap with the CIDRs you assigned while you enabling workload management on hosting cluster)
Review deployments parameters in step 8 and if all is good then hit FINISH
Creating the TKG cluster process will kick-in and you can see a Cloud Director task running for that, give it couple of minutes (depending on your cluster size) to get created
In this step, we will check the status of the newly created TKG cluster from vCenter and will log to it through kubectl to check the node and cluster status. Login to vCenter UI (the one which we added in Cloud Director) and under Inventory expand Namespaces and you should see our newly created TKG cluster listed as VMs
From my home lab Ubuntu Jumpbox I will login to this TKG cluster and check the cluster status closely
Note: I found that Cloud Director created a T1 GW firewall blocking all communication to the kube-api interface address which is assigned from my NSX load balancer to the new created cluster, and thus I was not able to run any kubectl commands against my tkg cluster and also was not able to ping kube-api IP (172.10.110.3) so I worked around this issue by allowing the traffic from my jumpbox network.
All nodes are running in Ready state which means our TKG cluster is ready to host workload deployments. Status can also be verified from vCenter
Hope you find this blog post useful.
Overview NSX Advanced Load Balancer (a.k.a Avi) offers variety of advanced load balancing and application…
Overview With the release of VMware NSX 4.0 VMware announced the deprecation of NSX standard…
Overview Backup and restore is the main building block in any organisation's disaster recovery policy…
Overview In this blog post I am going to walk you through the configuration of…
Overview NodePortLocal is a feature that is part of the Antrea Agent, through which a…
Overview In part two of this blog post, we will be using NSX DFW to…
View Comments