
Although vSphere with K8s with NSX-T networking have been around for a while, it is after the release of NSX Application Platform (NAPP) in NSX-T 3.2 useful to revisit how we can configure and deploy vSphere K8s as a pre-requisite for NAPP.
During this lab I came across many interesting and challenging issues in the way of setting up the supervisor management cluster and I thought of sharing this also in this blog post so others who might face the same issues can find a solution and move forward.
Lab Inventory
For software versions I used the following:
- VMware ESXi, 7.0.2, 17867351
- vCenter server version 7.0.1.00200
- NSX-T 3.1.3.5
- TrueNAS 12.0-U7 used to provision NFS datastores to ESXi hosts.
- VyOS 1.1.8 used as lab backbone router.
- Ubuntu 18.04.6 LTS for running kubectl and push docker images to Harbor.
- Ubuntu 20.04.2 LTS as DNS and internet gateway.
- Windows Server 2012 R2 Datacenter as management host for UI access.
For virtual hosts and appliances sizing I used the following specs:
- 2 x virtualised ESXi hosts each with 8 vCPUs, 4 x nics and 64 GB RAM.
- vCenter server appliance with 2 vCPU and 24 GB RAM.
- NSX-T Manager medium sized deployment with 6 vCPUs and 24 GB RAM.
- 2 x Large edge nodes with no memory reservation.
- NSX load balancers deployed by WCP (service which deploys the workload management supervisor cluster) need enough resources on the edge nodes and this can be guaranteed only by large edge deployment.
Step 1: NSX and Networking Preparation
Adding vCenter compute manager and enabling Trust
You need to add your vcenter server as compute manager under your NSX-T manager and enable Trust, this is a must if you want to use NSX-T as the networking provider for your supervisor management cluster and TKG.

IP Pools for Transport nodes and Edge TEPs
- You need to have separate IP subnets for your edges TEPs and your transport nodes TEPs since we are going to share the same physical NICs on the hosts.
- In my lab, I created an EDGE TEP pool with IP range 30.30.30.1 – 30.30.30.20
- For the Transport Nodes I created an IP Pool with range 50.50.50.1 – 50.50.50.20

Create Transport Nodes and Edge uplink profiles
This step is important as we need to set the MTU for minimum of 1700 bytes on the TNs and Edges uplinks. VMware recommends a minimum of 1600 bytes for MTU but in my lab when I used 1600 I got funny behaviour while setting up the workload management supervisor cluster, and hence my recommendation to use MTU 1700 bytes on VDS, all TEP interfaces, uplinks and ESXi management vmkernel port groups.

In the uplink profiles I also configured the VLAN tagging for both the underly network carrying the overlay TEP traffic and VLAN tagging for VLAN edge uplinks connecting the eventually created T0 to the physical network.
Adding Edge VMs with no resource reservation
As part of the NSX preparation we need to deploy an edge cluster with a minimum of one Edge node. As per VMware documentation, an Edge of size Large is needed in order to properly host the NSX load balancers that will be created as part of enabling the workload management. I thought that this is a requirement for production environments but even in my lab I had issues with NSX load balancers down when Edges were not deployed as Large form factor.
Since this is a lab then conserving resources is very important, so when you deploy your Edge VM and choose its size to be large expand the advanced settings and set all reservations to minimum. Set shares to Low 2000 and memory reservation to 0

Once Edges are deployed (one edge is enough) you need to create an Edge cluster and add your edge node(s) to it.
Prepare cluster(s) for NSX
You need to configure NSX on at least one cluster in order to be able to run vsphere K8s on that cluster nodes.
Deployment of T0, T0 uplinks and setting BGP routing with core router
You need to deploy a T0 router to provide routing for the load balancers VIPs and eventually deployed K8s Pods, this is crucial and you need to make this step as simple as possible because routing can get very messy and thats the reason I chose a dynamic routing protocol (BGP) and not static routes.
You need first to add 2 VLAN based logical segments that we are going to assign to our T0 as uplinks to the physical core router. In my setup, I have configured the below segments

Assign the above segments as Interfaces for your T0 and do not forget to set MTU on both interfaces to 1700 bytes.

In my lab I then configured 2 BGP neighbours on the T0 pointing to the uplink interfaces on my core router:

Once you enable route redistribution in BGP on the T0, the route redistribution configuration should look like the below:

Step 2: Enabling Workload Management
In this step we will be configuring the workload managent which will create the supervisor management cluster from which we will be creating our namespaces and getting our very first containerised webserver up and running.
Enabling Workload Management
Navigate to your vCenter server web client and click on Menu > Workload Management and then click on Get Started

Choose NSX-T deployment as we will be using NSX-T as our networking layer provider i.e. utilising NSX NCP (Network Container Plugin).

Your NSX prepared clusters should appear in the list of compatible clusters, if not then you have not enabled Trust while adding your vCenter as compute manager in NSX-T

Next step is to choose the size of the deployment, for my lab I chose Tiny, this should be sufficient for most of home lab needs

After that choose a storage policy (storage policy needs to be created beforehand).

Next two steps are configuring both the management and workload network parameters for vSphere K8s, it is very important to understand the traffic flow and the use of every subnet of address range that you assign. No overlap is allowed between the different assigned IP blocks/ranges. The below network diagram shows the interconnection between different components.

Below is the network parameters for my home lab for the supervisor cluster management network:

Step 6 in the wizard is configuring workload management workload network

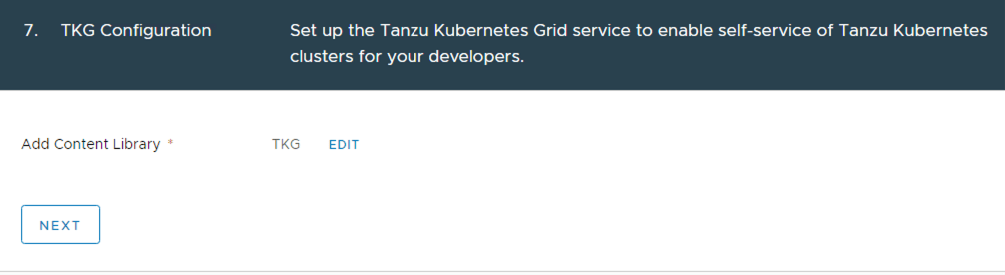
Next step is to choose a content library for your TKG and then confirm and start the process of enabling workload management on your cluster.
Once you click Next and then Finish on the final review screen, the process will take about 30 minutes to deploy supervisor cluster VMs and deploy all the related NSX segments, load balancers, T1, IP prefix rules, DFW and so on. It is important to mention that you all the created objects by the WCP/EAM cannot be modified by the user and should not be tampered with.


Pingback: Deploying Namespaces and Pods on vSphere with kubernetes - NSXBaas
Pingback: Monitoring VMware NCP based TKGi & K8s clusters using vRNI - NSXBaas
Pingback: Deploying VMware NSX NAPP (NSX Application Platform) on TKGS - nsxbaas
Pingback: Deploying Tanzu Workload Availability Zones on vSphere 8 with NSX-T Networking - nsxbaas
Pingback: Enable Workload Management (vSphere with Tanzu) with NSX ALB - nsxbaas
Pingback: Configuring Layer 7 Ingress using AKO for vSphere with Tanzu on NSX-T Networking - nsxbaas
THANK YOU SOOOOOOO MUCH
been racking my brains with an issue deploying the workload management and it was the MTU bit you highlighted 🙂
I had sleepless nights because of this one 🙂
Hi sir, thank you for tutorial. Is it possible to enable workload management with only one edge as a cluster?
Hi,
thank you so much for your amazing article.
I have a question. What are VMs’s password After they will be deployed?