

Overview
Note: After I have written this blog post I got to hear that work on maintaining project Octant might come to an end, so I thought to include this piece of news as well.
Project Octant is an open source project which offers introspection capability into Tanzu and native Kubernetes clusters. It offers a comprehensive web interface for viewing clusters information and applications deployed on top of them. Octant offers a combination of introspective tooling, cluster navigation, and object management along with a plugin system to further extend its capabilities. Some of VMware project Octant includes:
- Resource Viewer
- Summary View
- Port Forward
- Log Stream
- Label Filter
- Cluster Navigation
- Plugin System
Octant is installed on the same host from which you run kubectl to manage your Tanzu clusters and can be deployed on different operating systems (for more information check Octant Github page). In my setup, I will be deploying Octant on my Ubuntu Linux 18.04 and will connect and view my current Tanzu Kubernetes Clusters deployed on vSphere with Tanzu with NSX ALB.
Lab Inventory
For software versions I used the following:
-
- VMware ESXi 7.0U3d
- vCenter server version 7.0U3g
- NSX Advanced Load Balancer version 22.1.2
- TrueNAS 12.0-U7 used to provision NFS data stores to ESXi hosts.
- VyOS 1.4 used as lab backbone router and DHCP server.
- Ubuntu 20.04.2 LTS as DNS and internet gateway.
- Ubuntu 18.04 LTS as Jumpbox and running kubectl to manage Tanzu clusters.
- Windows Server 2012 R2 Datacenter as management host for UI access.
For virtual hosts and appliances sizing I used the following specs:
-
- 3 x ESXi hosts each with 12 vCPUs, 2 x NICs and 128 GB RAM.
- vCenter server appliance with 2 vCPU and 24 GB RAM.
Deploying Octant on Ubuntu Linux
You can deploy Octant as a Debian package or you can install Octant as a service daemon which can be accessed from a remote host. In this blog post I will be using the latter option. List of Octant release binaries and packages can be downloaded from the Releases pages.
I will be pulling the below tar archive

From my Linux host I will wget the above archive and untar it as below


Summary of the commands used above
wget https://github.com/vmware-tanzu/octant/releases/download/v0.25.1/octant_0.25.1_Linux-64bit.tar.gz
tar -zxvf octant_0.25.1_Linux-64bit.tar.gz
sudo cp octant_0.25.1_Linux-64bit/octant /usr/local/bin
Generate a Tanzu Kubernetes Cluster Configuration File with a Non-Expiring Token
Octant uses kubeconfig files to connect to Tanzu/Kubernetes clusters, for Tanzu Kubernetes Clusters deployed on vSphere with Tanzu, clusters are deployed with a default kubeconfig file which has an expiry authentication token of 10 hours. This will cause errors in Octant while monitoring your Tanzu clusters and to avoid that we need to generate a new kubeconfig file with a non-expiring token and use that one. The detailed steps of doing that are in VMware documentation but I also included the steps from my lab in this blog post as well.
Step 1: Log in the vSphere with Tanzu Guest Kubernetes cluster
kubectl vsphere login --server <supervisor-cluster_ip> -u <user> --tanzu-kubernetes-cluster-name <tk-cluster-name> --tanzu-kubernetes-cluster-namespace <namespace>

Step 2: Create a service account and assign it the cluster-admin role
kubectl create serviceaccount harai-goshi-admin -n kube-system

kubectl create clusterrolebinding harai-goshi-admin --serviceaccount=kube-system:harai-goshi-admin --clusterrole=cluster-admin

Step 3: Generate a new authentication token for admin service account
SECRET=$(kubectl get serviceaccount harai-goshi-admin -n kube-system -ojsonpath='{.secrets[].name}')

TOKEN=$(kubectl get secret $SECRET -n kube-system -ojsonpath='{.data.token}' | base64 -d)

kubectl get secrets $SECRET -n kube-system -o jsonpath='{.data.ca\.crt}' | base64 -d > ./ca.crt

Step 4: Retrieve Tanzu cluster URL and generate a new Kubeconfig file using the new token
CONTEXT=$(kubectl config view -o jsonpath='{.current-context}')

CLUSTER=$(kubectl config view -o jsonpath='{.contexts[?(@.name == "'"$CONTEXT"'")].context.cluster}')

URL=$(kubectl config view -o jsonpath='{.clusters[?(@.name == "'"$CLUSTER"'")].cluster.server}')

TO_BE_CREATED_KUBECONFIG_FILE="<file-name>"

kubectl config --kubeconfig=$TO_BE_CREATED_KUBECONFIG_FILE set-cluster $CLUSTER --server=$URL --certificate-authority=./ca.crt --embed-certs=true

kubectl config --kubeconfig=$TO_BE_CREATED_KUBECONFIG_FILE set-credentials napp-admin --token=$TOKEN

kubectl config --kubeconfig=$TO_BE_CREATED_KUBECONFIG_FILE set-context $CONTEXT --cluster=$CLUSTER --user=napp-admin

kubectl config --kubeconfig=$TO_BE_CREATED_KUBECONFIG_FILE use-context $CONTEXT


Starting and accessing Octant UI
You can start Octant either as a process running in the background or as a service daemon which starts every time your host starts up. I will highlight both options in this blog post.
Running Octant as a background process
Starting Octant is quite simple, just run the binary file from your command shell “/usr/local/bin/octant” this however will use default parameters such as listening only on 127.0.0.1:7777 for accessing UI and does not have a default location for Kubeconfig file of the cluster(s) that will be monitored/managed by that Octant instance. So, in order to start Octant with proper settings and pass the location of the Kubeconfig file, run the following command from your shell
export KUBECONFIG=~/harai-goshi-kubeconfig.conf

OCTANT_LISTENER_ADDR=0.0.0.0:9800 OCTANT_ACCEPTED_HOSTS=0.0.0.0 OCTANT_DISABLE_OPEN_BROWSER=true nohup octant &

The first command defines an environment variable called KUBECONFIG with the path of the kube configuration file we created earlier, while the other command passes some other environment variables which are defined as follows:
- OCTANT_LISTENER_ADDR – Listening IPs and the port (0.0.0.0 – “All IP addresses of the local machine”) and 9800 is the TCP port number for incoming HTTP requests to access UI
- OCTANT_ACCEPTED_HOSTS – Local IP address of the machine it runs on.
I am setting both values to 0.0.0.0 to allow incoming requests on all available IP addresses of my host.
The above method is however a manual method and you will have to either add the above command as a cron job to start every time host boots up or manually, which is not very practical. A better way is to create an octant daemon service with the above parameters and added it to systemd so that it starts automatically in the background every time the host starts, check the next step to learn how.
Running Octant as a systemd service
We simply need to create a standard service file with Octant parameters and then copy that file to /etc/systemd/system/ this is the directory from which Ubuntu loads daemon services. First, create a file called octant.service and add the following to it (note: you need to adjust the values shown to your setup)
[Unit]
Description=octant

[Service]
Environment="HOME=/home/bassem"
Environment="OCTANT_ACCEPTED_HOSTS=0.0.0.0"
Environment="KUBECONFIG=/home/bassem/harai-goshi-kubeconfig.conf"
Environment="OCTANT_LISTENER_ADDR=0.0.0.0:9800"
Environment="OCTANT_DISABLE_OPEN_BROWSER=true"
Environment="PATH=/bin:/usr/local/sbin:/usr/local/bin:/usr/sbin:/usr/bin"
WorkingDirectory=/usr/local/bin/
ExecStart=/usr/local/bin/octant
Type=simple
Restart=on-failure

[Install]
WantedBy=multi-user.target
Save and exit your text editor, modify the permissions of the above file to allow read and execute for all users/groups and then copy it to /etc/systemd/system/
chmod 755 octant.service
sudo cp octant.service /etc/systemd/system/
Start and enable the service
sudo systemctl start octant.service
sudo systemctl enable octant.service
Now if you check the status of the newly created Octant service it should be shown as successfully loaded and running

As you can see Octant dashboard is also accessible via http://<any ip address of hostmachine>:9800
Accessing Octant UI and navigating through Tanzu Kubernetes cluster
From any web browser navigate to the above address and then you should be able to see Octant UI

By default, Octant will display overview of the default namespace (see above right corner) and notice the name of our cluster (harai-goshi) also highlighted as context. Note, if you need to include multiple clusters then you need to include the Kubeconfig file of those clusters in a single Kubeconfig file and use that in the Octent configuration, you will then be able to switch between clusters in Octant UI by simple choosing a different Context.
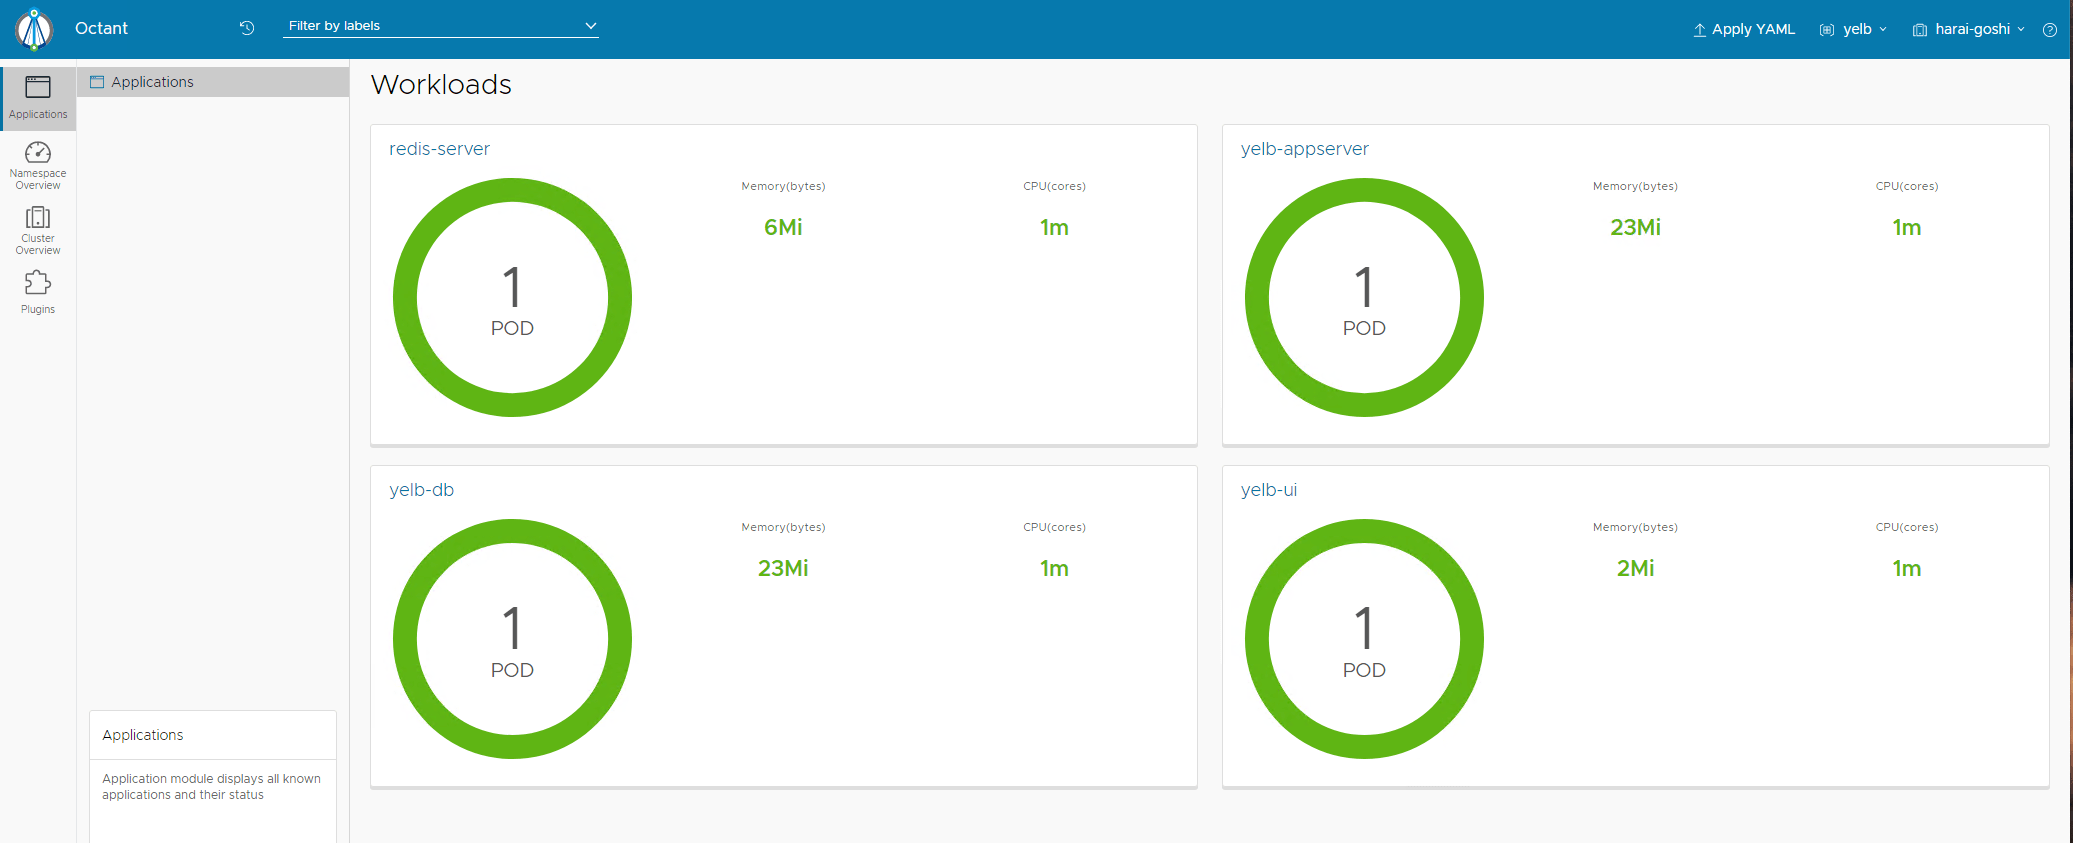
In my setup, I created a test Namespace called “yelb” which contains a test application I use to demo my Tanzu/Kubernetes deployments. Click on the default namespace and choose yelb namepsace instead, now I should be able to see more information about deployments, daemonsets and pods under that namespace

Below are some screenshots from different information that you can pull via Octant UI


And a very handy and cool feature where you can gain access to pod shell via Octant


Hope you have found this blog post useful!


